FAQs

Why aren't there any Shortcodes?

There's a lot of debate in the WordPress community as to whether WordPress themes should include shortcodes, or if they should even be used at all. I don't mind shortcodes per se, as long as they're used sparingly and they're kept simple. I've seen way too many themes that include hundreds of shortcodes and require you to use them to build complex page layouts. When they're used like this they're cumbersome, messy and make editing your page content a complete nightmare! Other times, themes include all these shortcodes and 99% of the time, people just don't need them.

I'm of the opinion, if you need shortcodes, then go grab one of the many plugins from the WordPress Plugin Directory that provide that functionality. That way, you can find something that not only matches your needs, but for the other people who don't need them, there wont be unnecessary code clogging up the theme.

Are there any image sliders or forms?

Like shortcodes, images sliders and contact forms are best served from dedicated plugins. If you're looking to implement a contact form, I highly recommend Gravity Forms. It makes adding forms super easy!

If you want a simple image slider that's easy to implement and customisable, go check out Meteor Slides.

How do I use the icons?

It's super simple to use the icons if your're modifying the theme. Simply add the relevant icon class to an <i></i> tag. You can find the complete list of icons on the sample typography and icons page.

Inline Icons

Place Font Awesome icons just about anywhere with the <i></i> tag.

fa-rocket

<i class="fa fa-rocket"></i> fa-rocket
Icon classes are echoed via CSS :before.

Larger Icons

To increase the size of icons relative to its container, use fa-lg (33% increase), fa-2x, fa-3x, fa-4x or fa-5x.

fa-camera-retro

fa-camera-retro

fa-camera-retro

fa-camera-retro

fa-camera-retro

<i class="fa fa-camera-retro fa-lg"></i> fa-camera-retro
<i class="fa fa-camera-retro fa-2x"></i> fa-camera-retro
<i class="fa fa-camera-retro fa-3x"></i> fa-camera-retro
<i class="fa fa-camera-retro fa-4x"></i> fa-camera-retro
<i class="fa fa-camera-retro fa-5x"></i> fa-camera-retro
If your icons are getting chopped off on top and bottom, make sure you have sufficient line-height.

Spinning Icons

Use the fa-spin class to get any icon to rotate. Works best with fa-spinner, fa-refresh and fa-cog.

Spinning Spinner icon
Spinning Refresh icon
Spinning Cog icon

<i class="fa fa-spinner fa-spin"></i> Spinning Spinner icon
<i class="fa fa-refresh fa-spin"></i> Spinning Refresh icon
<i class="fa fa-cog fa-spin"></i> Spinning Cog icon
CSS3 animations aren't supported in IE7 – IE9.

Rotated & Flipped

To arbitrarily rotate and flip icons, use the fa-rotate-* and fa-flip-* classes.

  normal

fa-rotate-90

fa-rotate-180

fa-rotate-270

fa-flip-horizontal

icon-flip-vertical

<i class="fa fa-shield"></i> normal
<i class="fa fa-shield fa-rotate-90"></i> fa-rotate-90
<i class="fa fa-shield fa-rotate-180"></i> fa-rotate-180
<i class="fa fa-shield fa-rotate-270"></i> fa-rotate-270
<i class="fa fa-shield fa-flip-horizontal"></i> fa-flip-horizontal
<i class="fa fa-shield fa-flip-vertical"></i> icon-flip-vertical

Stacked Icons

To stack multiple icons, use the fa-stack class on the parent, the fa-stack-1x for the regularly sized icon, and fa-stack-2x for the larger icon. fa-inverse can be used as an alternative icon color. You can even throw larger icon classes on the parent to get further control of sizing.

fa-twitter on fa-square-o
fa-flag on fa-circle
fa-terminal on fa-square
fa-ban on fa-camera

<span class="fa-stack fa-lg"><i class="fa fa-square-o fa-stack-2x"></i><i class="fa fa-twitter fa-stack-1x"></i></span> fa-twitter on fa-square-o
<span class="fa-stack fa-lg"><i class="fa fa-circle fa-stack-2x"></i><i class="fa fa-flag fa-stack-1x fa-inverse"></i></span> fa-flag on fa-circle
<span class="fa-stack fa-lg"><i class="fa fa-square fa-stack-2x"></i><i class="fa fa-terminal fa-stack-1x fa-inverse"></i></span> fa-terminal on fa-square
<span class="fa-stack fa-lg"><i class="fa fa-camera fa-stack-1x"></i><i class="fa fa-ban fa-stack-2x text-danger"></i></span> fa-ban on fa-camera
How did you add the button to the homepage banner?

The button was added using a simple html link within a Text Widget in one of the Front Page Banner Widget areas. The link was then assigned the btn class.

To increase or reduce the size of the button, use the btn-large or btn-small class as well.

Call to action!

Call to action!

Call to action!

<p><a class="btn btn-large" href="#">Call to action!</a></p>
<p><a class="btn" href="#">Call to action!</a></p>
<p><a class="btn btn-small" href="#">Call to action!</a></p>
How did you add the separator in the dropdown menu?

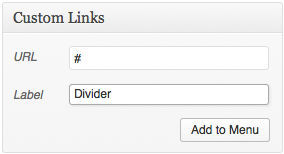
You can add separator in between the dropdown menu items simply by adding a custom link and assigning it a class. On the Appearance > Menus page, add a Custom Link similar to below. The URL should be ‘#' and the Label can be whatever you like. Add it to your menu by clicking the Add to Menu button.

custom-link

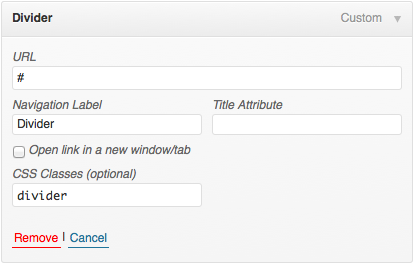
After the link has been added to your menu, simply add ‘divider' to the CSS Classes field. (If you can't see the CSS Classes field, you will need to enable it using the Screen Options button at the top right of your page).

divider-menu

How did you add the 'Menu header' in the dropdown menu?

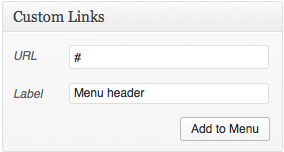
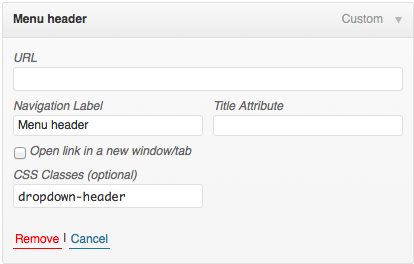
You can add non-clickable menu headers in between the dropdown menu items simply by adding a custom link and assigning it a class. On the Appearance > Menus page, add a Custom Link similar to below. The URL should be ‘#' and the Label can be whatever you like. Add it to your menu by clicking the Add to Menu button.

custom-link-header

After the link has been added to your menu, simply add ‘dropdown-header' to the CSS Classes field. (If you can't see the CSS Classes field, you will need to enable it using the Screen Options button at the top right of your page). After the link has been added to the menu, you can also remove the ‘#' from the URL field. This will prevent the menu item from being clickable.

(Please note: You can't add a Custom Link to a menu without having a valid URL, hence the need for the ‘#' in the initial step)

header-menu

How do I get the blog to only show part of the post?

If your blog page is displaying the whole Post, rather than just a ‘teaser', all you need to do is insert a ‘More tag' into your content by clicking the ‘Insert More Tag' button on the Editor Toolbar (Insert More Tag). When you insert a “More” tag into your Post, everything prior to the tag is considered as this post ‘teaser'. Most times you’d only use this button when you’re creating a blog Post, rather than a Page.

How do I setup my homepage like your demo site?

First up, you should create two new pages. One called Homepage and another called Blog. Next, you need to change your sites Front Page so that it's displaying a Static Page, rather than your latest posts. You do this within the SETTINGS > READING page. For the option ‘Front page displays', select ‘A static page' and then select the Page you want to display for the homepage and the page you want to use for your blog posts. So, for the ‘Front Page' option, you'd select the Homepage Page that you just created and for ‘Posts Page', select the Blog Page you created.

When creating the page to use for your ‘Front Page', make sure to set the template to Front Page Template using the ‘Template' dropdown list in the Page Attributes panel on the right of the page.

Next, in the APPEARANCE > WIDGETS page, add a text widget to the First Front Page Banner Widget. Add a title to the text widget and in the content area, I added the following:

<h2>Your basic building block for creating beautiful, responsive custom themes built on HTML5 & CSS3</h2>
<p><a class="btn btn-large" href="#">Call to action!</a></p>

You can obviously change the text as you please and add a proper url to the link.

In the Second Front Page Banner Widget I just added another text widget and added the following img html tag:

<img src="insert-your-image-url-here" alt="Add your img ALT text in here" />

You could also use something like this Image Widget plugin. It's a great little plugin that allows you to add images to your widgets really easily.

The three widget areas below the main content are simply text widgets again, added to the First Front Page Widget Area, Second Front Page Widget Area and Third Front Page Widget Area.

Are there any Theme Options I can set?

There sure are. I purposely haven't included heaps of theme options so that the theme is real easy to setup. Too many times I've seen ‘Premium' themes with hundreds of theme options. Not only is this confusing for people to setup, but it's also extremely time consuming.

In Quark, I have three pages of theme options (if WooCoomcere is installed). If WooCoomerce IS NOT installed, you will only see two Theme Option tabs.

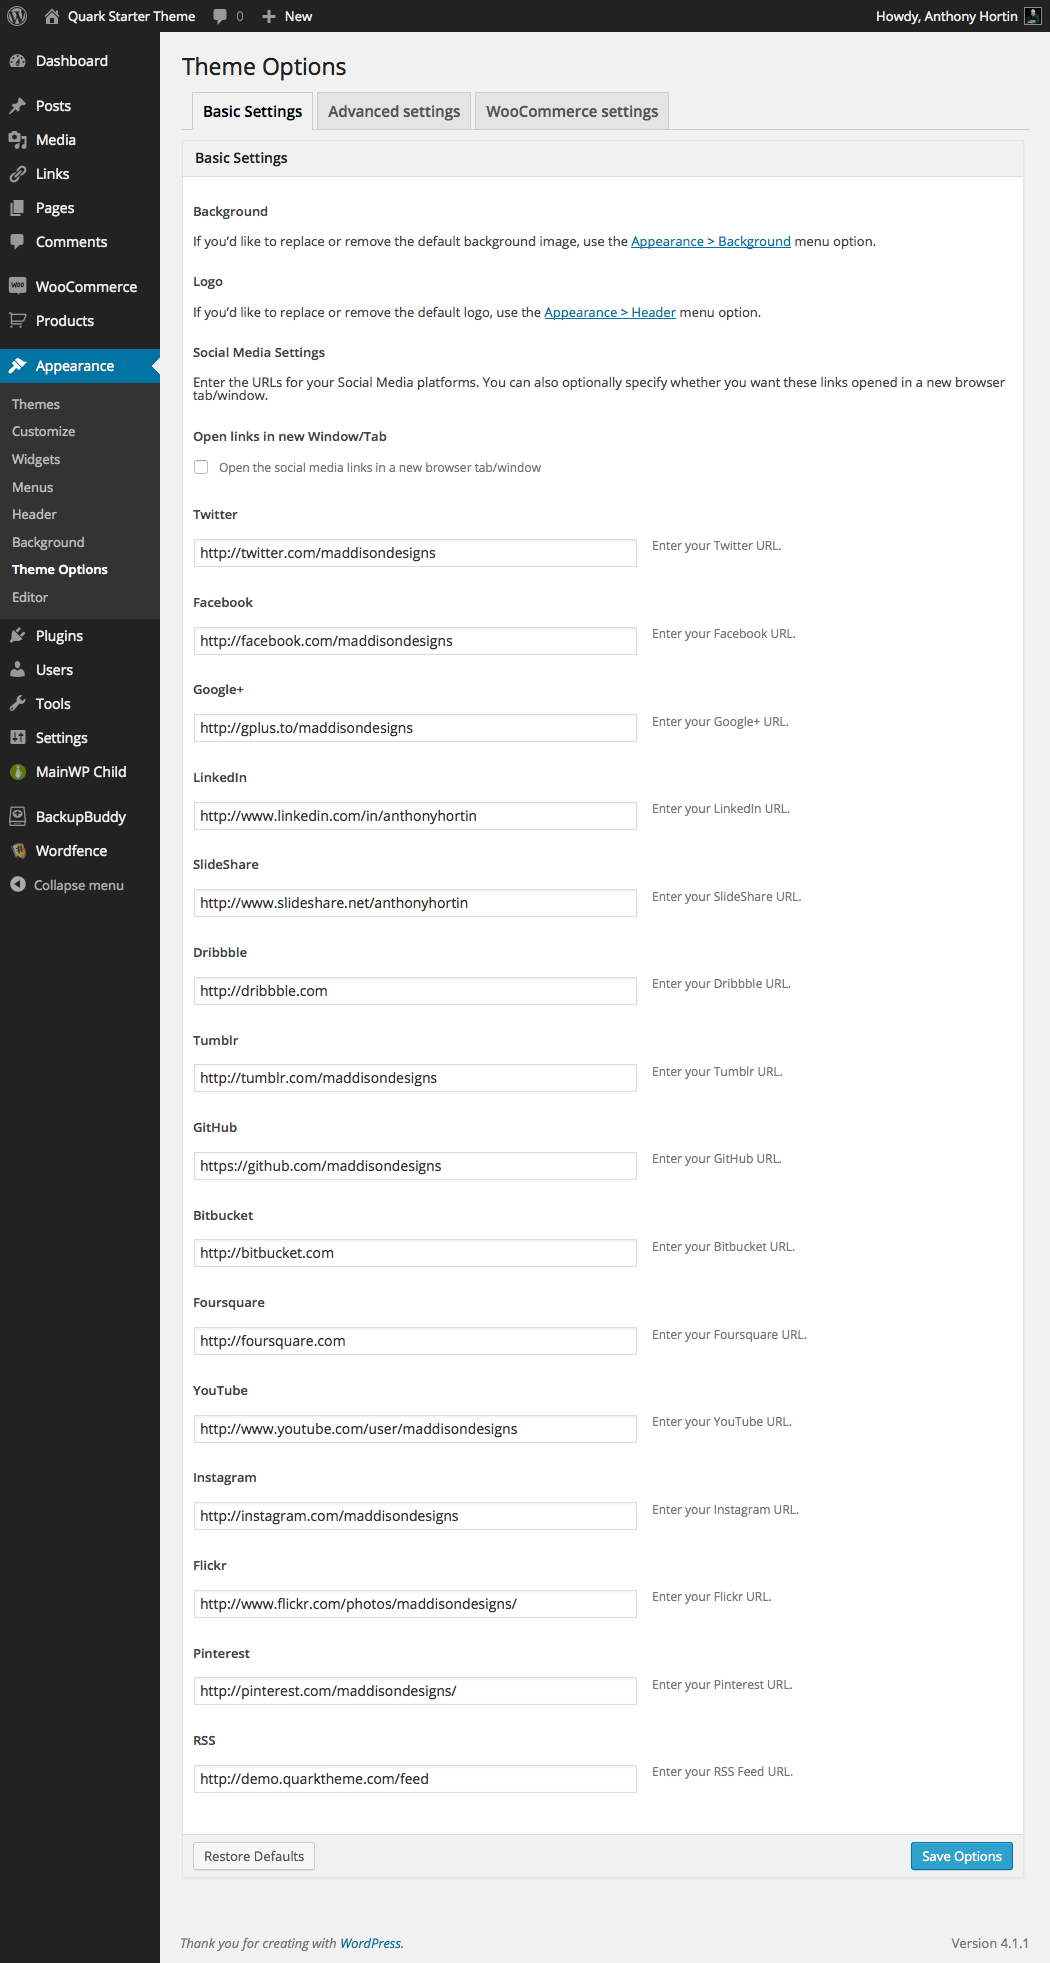
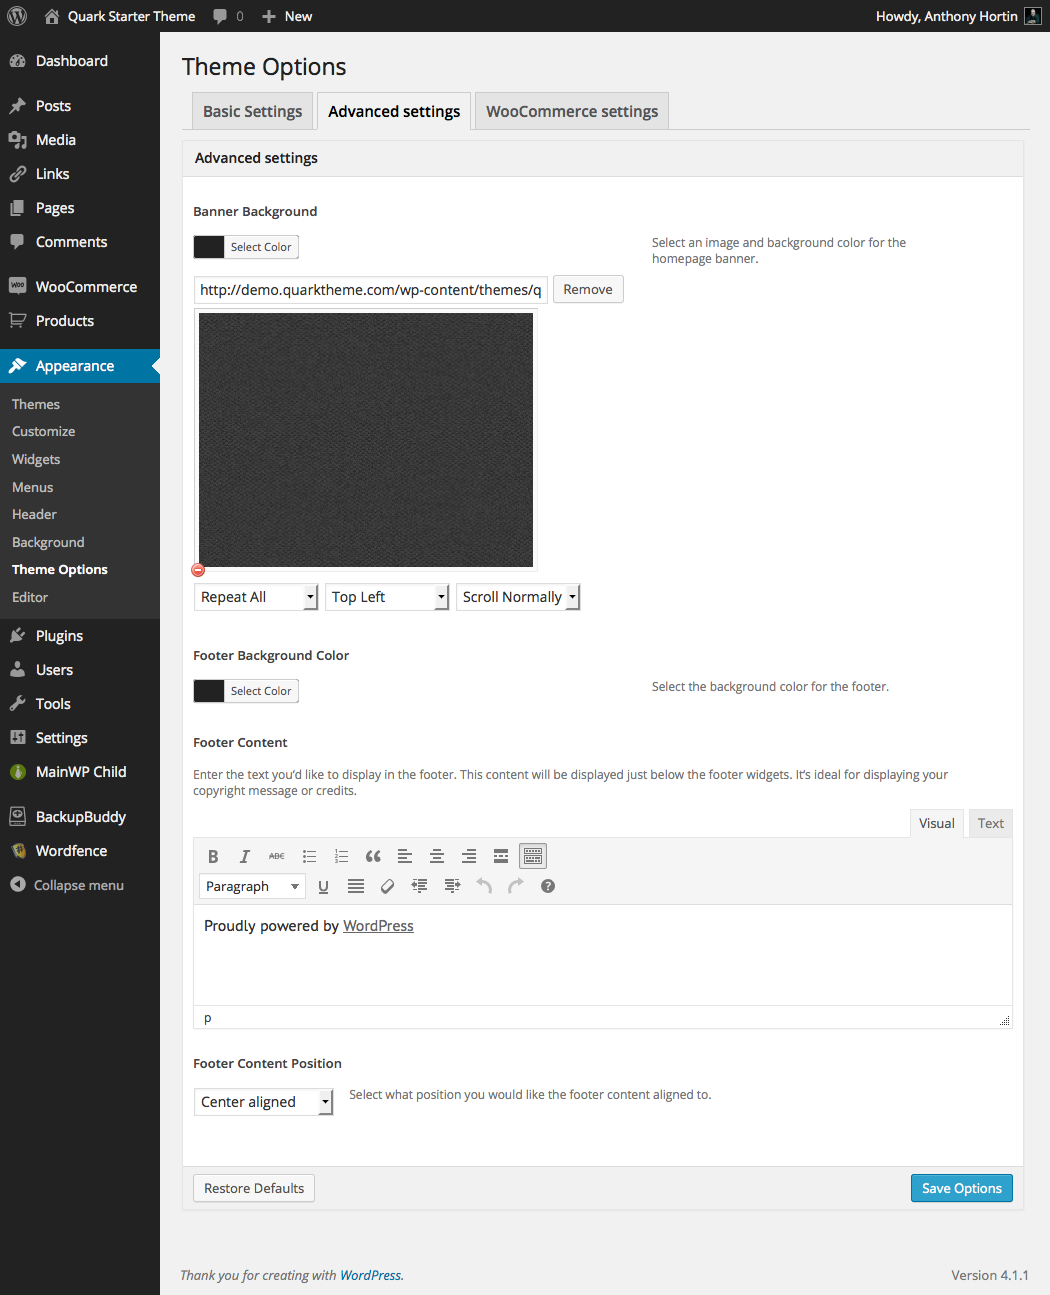
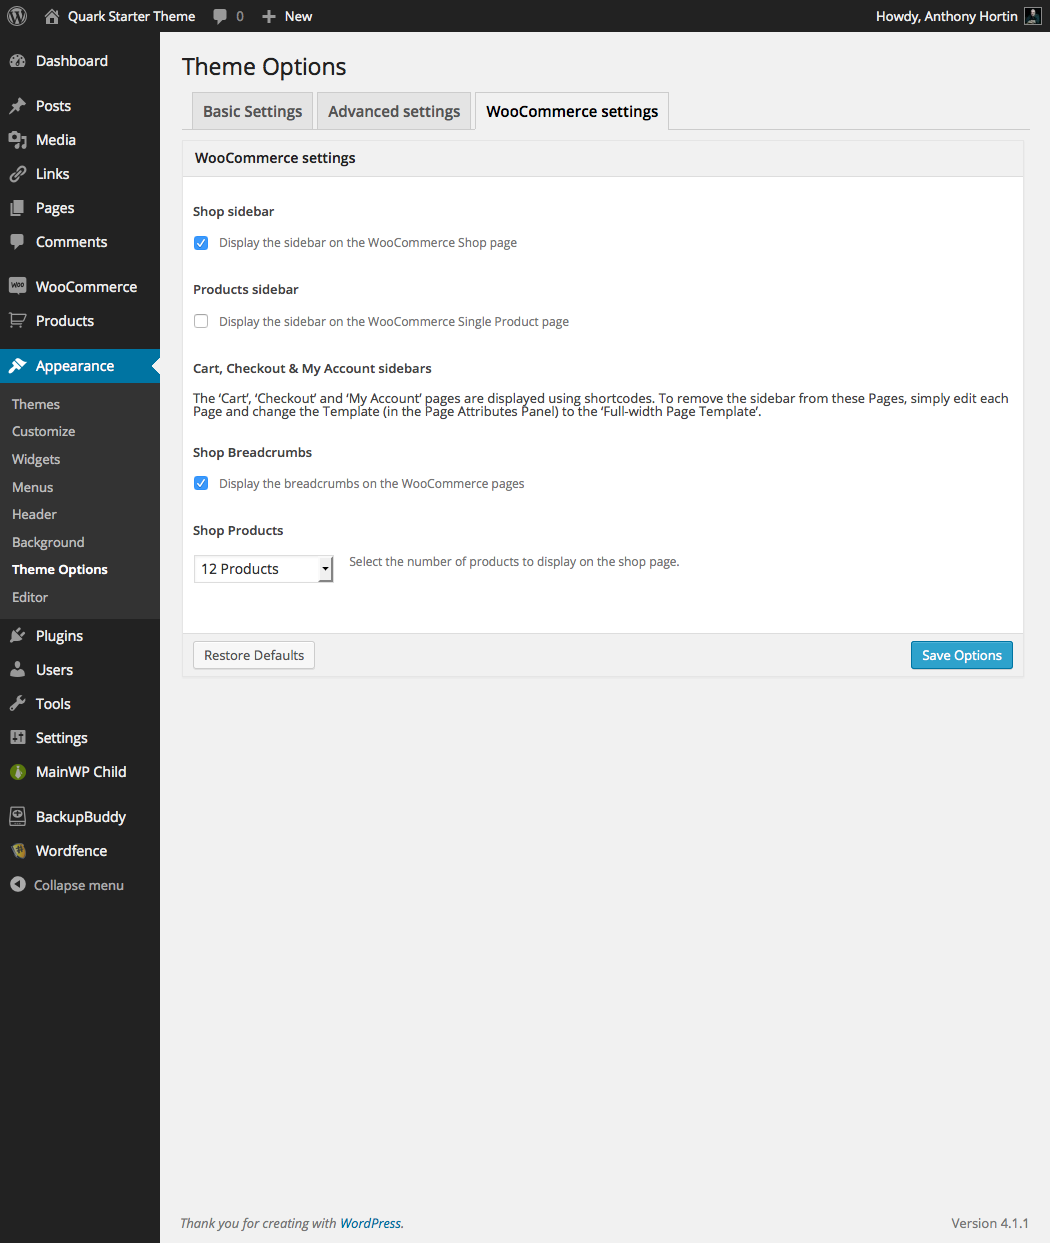
The Basic Settings tab allows you to manage your social media urls. The Advanced Settings tab allows you to change a few miscellaneous options such as your banner background image, footer colour and a couple of other options. The WooCommerce tab (when WooCommerce is installed) allows you to change some WooCommerce specific settings. You can view the pages below.

Manage your social media urls on the Basic Settings tab.

Quark Theme Options Basic Settings


Manage your other settings on the Advanced Settings tab.

Quark Theme Options Advanced Settings

Manage your WooCommerce settings on the WooCommerce Settings tab.

Quark Theme Options WooCommerce Settings


You can also manage the site background image/colour and the logo by using the standard WordPress Background and Header options, located under the Appearance menu option.

How do I change the Google Fonts?

Currently, Quark is using PT Sans for the main body copy and Arvo for the headers. If you want to use different fonts, it's fairly easy to do. You will be required to change some PHP code though, so if you're not familiar with PHP or feel uncomfortable updating code, then I would recommend getting your web developer to make the change so that you don't accidentally break your theme. With that said, let's get started…

The Google Fonts are set within the themes functions.php file. Specifically, the function quark_fonts_url(). In this example, I'll be changing the heading font from Arvo to Mill Goudy.

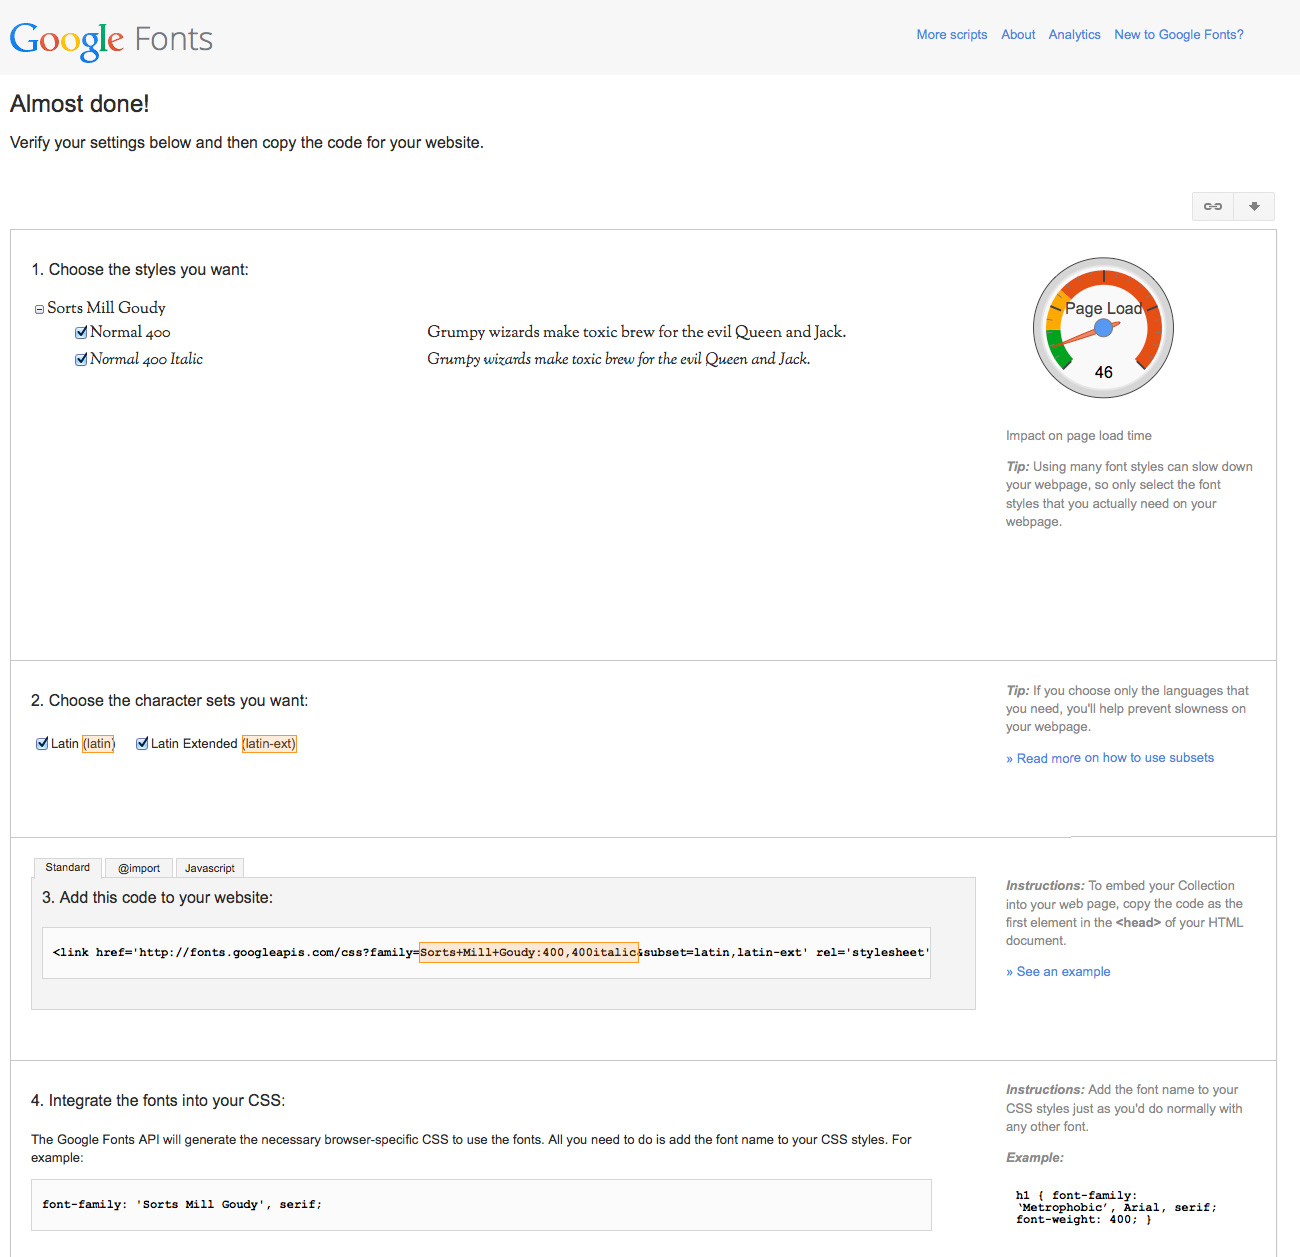
The first thing you need to do is go to Google Fonts, select your font and add it to your collection. At the bottom of the screen you'll see a bar showing how many fonts you have in your collection. At the very right of this bar, click the Use button to see how to use your fonts. This screen also allows you to select the different font weights such as Light, Italic, Bold, Heavy, etc.. The fonts weights that are available will be dependent on the font that you select. For Mill Goudy you have the option of Normal 400 and Normal 400 Italic. For this exercise we'll add both, so make sure that both checkboxes are selected next to the font weights (see image below).

To change the theme, find the quark_fonts_url() function within the functions.php file.

The first line you need to change tells the theme whether you want to use the font or not.

Since we're changing our heading font, change the following line…

$arvo = _x( 'on', 'Arvo font: on or off', 'quark' );

To this…

$millgoudy = _x( 'on', 'Mill Goudy font: on or off', 'quark' );

Technically, you don't need to change the PHP variable name, but we're doing it because it's good coding practice and if you're going to write code, you may as well write it properly! Future you will thank you!

When you have fonts that support non-english characters, you can select the different character sets that you want to include. Although we don't specifically need to add any for Mill Goudy, I'm going to include the Latin Extended character set just to show you how to do it.  This will work in the same way if you're including any other sets (depending on your chosen font).

Add in the following two lines, just below the line that we changed above.

$subset = _x( 'latin-extended', 'Mill Goudy font: add new subset (latin-extended)', 'quark' );

if ( 'latin-extended' == $subset )
    $subsets .= ',latin-ext';

These lines will check if we want to include the Latin Extended character set and if so, add that to our variable that contains the list of subsets that Google Fonts should include. You can see from the image below that I've used the name of the subset as shown on the Google Fonts page (latin-ext). (If you don't need to include any other character sets besides the default Latin, you don't need to add these few lines of code)

Next, change the if() statement so that it checks your new variable, instead of the old one. It should be changed to the following.

if ( 'off' !== $pt_sans || 'off' !== $millgoudy ) {

Now we need to tell Google exactly which font that we want to include (including their weights). Within our if() statement, change the following two lines from…

if ( 'off' !== $arvo )
	$font_families[] = 'Arvo:400';

To this…

if ( 'off' !== $millgoudy )
	$font_families[] = 'Sorts+Mill+Goudy:400,400italic';

If you're wondering where I found the font information (Sorts+Mill+Goudy:400,400italic), have a look at the image below. In section 3 you can see where I've highlighted the font details that you need to copy into your code.

The final step is to change your css stylesheet so that it uses this new font, rather than the old font. In section 4 of the image below, Google shows you how you can use your selected fonts.

For our example, if I want to change the headings to use our new font, we'd simply need to change the following bit of css in our style.css file…

h1, h2, h3, h4, h5, h6 {
	font-family: 'Sorts Mill Goudy', Arial, serif;
	font-style: normal;
	font-weight: 400;
	color: #333;
	margin-top: 0;
}

Google-Fonts

What Grid System does Quark use?

Quark uses a custom 12 column grid.

By default, for pages like the blog archive or pages with sidebars, it uses 8 columns for the main body content and 4 columns for the sidebar (8 + 4 = 12).

The widget areas in the homepage template and in the footer are quite smart. The columns will be dependent on the number of widget areas you use. So for example, on the Quark demo site, the footer is using 4 widget areas, each being 3 columns wide (4 x 3 = 12). In the main body of the homepage, the demo site is using 3 widget areas so that means each one will be 4 columns wide (3 x 4 = 12). In the homepage banner, if 2 widgets are being used, then they will be 6 columns each (2 x 6 = 12). If only one if being used, the banner area will be a full 12 columns wide (1 x 12 = 12).

If you want to change the columns to something different, then you'll need to change the appropriate templates. Within the main blog template (index.php) you'll see the grid specified like the following…

<div class="col grid_8_of_12">
...
</div>

The grid for the sidebar can be found in sidebar.php.

<div class="col grid_4_of_12">
...
</div>

If you want to change the grid on the homepage banner, then you'd need to change this in header.php.

Can Quark be used to create (& sell) a Premium Theme on a marketplace like ThemeForest?

Since Quark, and all other WordPress.org themes, are released under the GPL, you can use it to create Premium themes, but only on the condition that your new themes are also released under the same GPL license. So, if you wanted to sell your new theme on ThemeForest for example, you would be required to use their new 100% GPL license, rather than the traditional Envato Split license. For more information have a read up on the licensing options for theme and plugin authors on ThemeForest and CodeCanyon.

You can also find out more information on the GPL in this great Newbie’s Guide to the GPL and WordPress Licensing article from IvyCat.

Can I translate Quark into my own language?

You sure can! If you're using Quark and interested in helping translate it into your own language, that would be awesome! Simply head over to the GlotPress site on WordPress.org, select your language, and dive in! If you're new to translating WordPress, you can have a read through the Translator Handbook to get started 🙂